Setup instructions for the Google calendar synchronization extension for the Planyo booking system
First unzip the extension into a directory on your web server. You will need PHP support (v5.2 or higher) on the server. There are, however, no other requirements. After unzipping the files you'll need to make sure the setup script will have write permissions to the main extension directory, at least for the time of configuring the extension.
After launching the setup in your browser you'll need to enter your extension key. You've received it in the email sent to you after purchasing the extension.
 In the next step you're asked to enter your Google+ credentials. You'll need to click on the link below the API key field which will take you to https://code.google.com/apis/console?api=calendar.
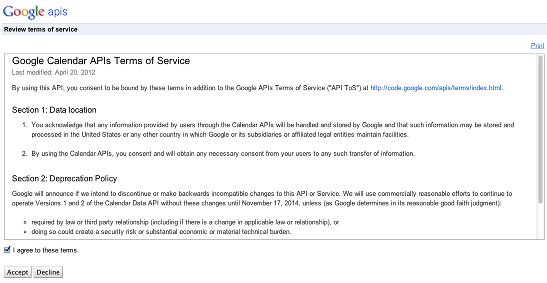
 The first step is acceptance of Google APIs terms of service:
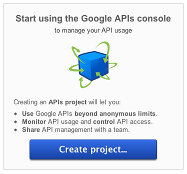
 Then click on the blue button to create a new Google API project:
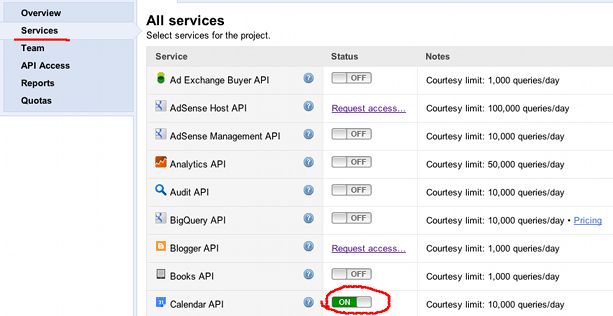
 Once you have access to Google APIs, in Services make sure the Calendar API is switched on:
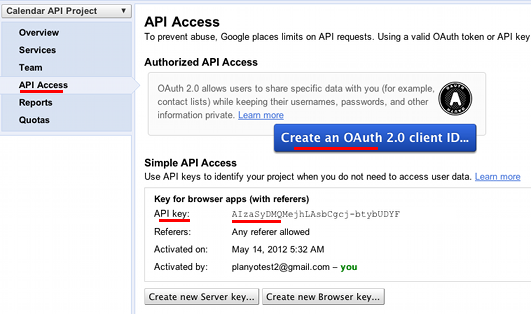
 Then go to API access and click on the blue button to create an OAuth client ID:
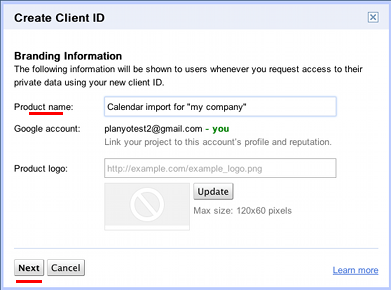
 In the next step, enter a name for your product, such as Calendar sync for "My company", you can leave the other options without change. Click Next.
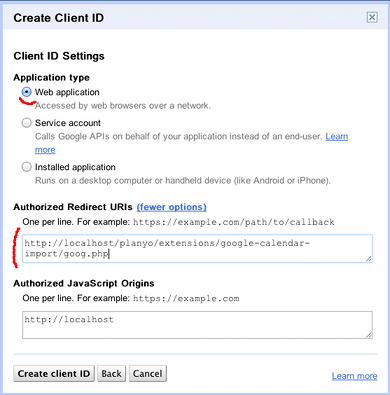
 In the next step, set the option Application type to Web application, then in Your site or hostname click the link (more options).
Now you can enter the redirect URI in Authorized redirect URIs
The redirect URI is needed to tell google where the sync script is located. Enter the full URL which is given to you by the extension's setup script:
In the next step, set the option Application type to Web application, then in Your site or hostname click the link (more options).
Now you can enter the redirect URI in Authorized redirect URIs
The redirect URI is needed to tell google where the sync script is located. Enter the full URL which is given to you by the extension's setup script:
 Click on Create client ID to finish. This will generate your credentials. Make sure the redirect URI is the same as specified by the setup script (it should end with goog.php).
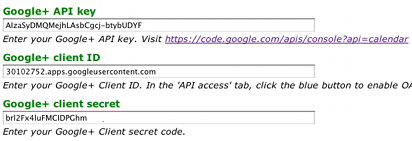
 Now, one by one, copy the API key, client ID and client secret and paste them into the setup script's extension settings.
 Click Continue and then in the next step click on the link at the bottom to allow the extension to access your Google calendar.
 Now for each resource set the calendar from which the events will be imported and the text which must be present in the title or description of events or a
star (*) if you simply want to import all events from given Google calendar. If you leave the calendar or identifier empty, no import will happen for that
resource. If you want to set up exporting of reservations into Google calendar, you'll need to make sure a calendar is chosen for given resource and that the
export setting is selected. You can choose between exporting of all reservations or only confirmed reservations.
Now for each resource set the calendar from which the events will be imported and the text which must be present in the title or description of events or a
star (*) if you simply want to import all events from given Google calendar. If you leave the calendar or identifier empty, no import will happen for that
resource. If you want to set up exporting of reservations into Google calendar, you'll need to make sure a calendar is chosen for given resource and that the
export setting is selected. You can choose between exporting of all reservations or only confirmed reservations.
 At this point the setup is complete. You can click the link to synchronize with debugging on. This will basically launch the sync script with the debug=1 parameter which will tell you which
events get imported/removed/created. You'll need to make sure the sync script (this is the URL you used for redirect URI in google apis) gets executed regularly (e.g. every 10 minutes or every hour)
in order for the import to work. By default the script will be executed once per hour by planyo. If you want to make this more frequent, you can use a
crontab mechanism provided by your hosting company. Export will always work immediately, without a delay.
At this point the setup is complete. You can click the link to synchronize with debugging on. This will basically launch the sync script with the debug=1 parameter which will tell you which
events get imported/removed/created. You'll need to make sure the sync script (this is the URL you used for redirect URI in google apis) gets executed regularly (e.g. every 10 minutes or every hour)
in order for the import to work. By default the script will be executed once per hour by planyo. If you want to make this more frequent, you can use a
crontab mechanism provided by your hosting company. Export will always work immediately, without a delay.