Planyo online reservation system - Learn more

Set-up Assistant - Step:
123456
BASIC
7891011
ADDITIONAL
121314151617181920
ADVANCED
1 BASIC: Create a new account TAKE ME THERE
First you need to create an account and activate it by verifying your email address. As with all steps of this assistant, click the Take me there button above to go to related Planyo page (in this case the sign-up page). Click it now if you're not on the Create a new account page. If you already have an account log in. Note that Planyo supports OpenID which means you can log in using your existing account, e.g. from Google or Yahoo. Go to OpenID login. You can also log in using your facebook account.
SKIP THIS STEP
Set-up Assistant - Step:
123456
BASIC
7891011
ADDITIONAL
121314151617181920
ADVANCED
2 BASIC: Add new site TAKE ME THERE
Now we'll create your Planyo site. Let's start with two definitions: Every single item that can be reserved (yachts, tennis courts, cars, bus seats, dormitory beds, hotel rooms or appointments with instructors, doctors, therapists etc.) is called a resource in Planyo. A totality of related resources managed by you (e.g. different boats of the same company, all rooms in a hotel, all driving instructors in a driving school etc.) is called a Planyo site.
Fill out the all fields in the form and click Submit when done. Hover over the: icons to read extended descriptions.
SKIP THIS STEP
Set-up Assistant - Step:
123456
BASIC
7891011
ADDITIONAL
121314151617181920
ADVANCED
3 BASIC: Site - Settings ADD NEW SITE
Now you can decide whether you want to take online payments from your users or not. This is recommended, most users are used to be able to pay online with a credit card. Payments are currently processed by PayPal, moneybookers, Sage Pay, WorldPay, Authorize.net, or MultiSafepay (or you can store clients' credit cards numbers on file on your server) and they go directly into your own account with them. You'll need to choose the processing company and enter your registered email address SHOW ME. Now fill out the remaining site settings. Don't forget to click Submit when done SHOW ME.
SKIP THIS STEP
Set-up Assistant - Step:
123456
BASIC
7891011
ADDITIONAL
121314151617181920
ADVANCED
4 BASIC: Add resources ADD NEW SITE
Now let's add resources to your Planyo site. If you have many identical resources (e.g. single rooms, multiple tennis courts, bus seats etc.) you only need to add a single resource and specify its quantity. If you have different resources (e.g. different holiday apartments, rental car types, therapists) you'll need to add separate resources. Click Add new resource to get started SHOW ME
SKIP THIS STEP
Set-up Assistant - Step:
123456
BASIC
7891011
ADDITIONAL
121314151617181920
ADVANCED
5 BASIC: Resource - Settings ADD NEW SITE
Let's set the resource settings. The first important setting is Reservation approval SHOW ME. This will change the whole reservation process. Time-related settings is another important section where you specify when and for how long the resource can be reserved. Rental duration SHOW ME can be changed if the duration is either fixed or depends on the type of service you want the client to choose from a list (e.g. different kinds of massage, each taking a different amount of time). See this FAQ question for a detailed manual of this important section. If you have very simple pricing (price per hour or day) you can enter it in Unit price SHOW ME. Otherwise, wait till step 7 to set your pricing. Click Submit to save your changes. Note that there are many quick links on this page that go to different settings for this resource. We'll cover them all in other steps of this assistant.
SKIP THIS STEP
Set-up Assistant - Step:
123456
BASIC
7891011
ADDITIONAL
121314151617181920
ADVANCED
6 BASIC: Upload/remove images ADD NEW SITE
Now let's add some images to the resource. This is not required but is always a good idea (if possible).
...You have now completed all steps of the basic set-up. Feel free to go back to step 4 to add remaining resources, or first go through the whole assistant and then go back to add other resources. The assistant will be compatible with both methods. Your Planyo site is now operational, and you can already do some testing! In further steps (additional and advanced) you will be able to fine-tune many important settings and embed the whole reservation system on your own website. Click here to see how your site is experienced by your clients. Warning! If you stay logged in as the administrator, making reservations will work differently than for your clients because administrators do not have to enter all required fields, don't have to confirm the email addresses etc. Log out first (or use a different browser) and go to to test reservations as a client.
SKIP THIS STEP
Set-up Assistant - Step:
123456
BASIC
7891011
ADDITIONAL
121314151617181920
ADVANCED
7 ADDITIONAL: Pricing manager ADD NEW SITE
Skip this step if you don't want Planyo to show prices to the clients. The pricing manager is organized in form of a table where for each resource you can add rules that will modify the final price (e.g. based on number of persons, duration, season etc.). The first table row (Default price) shows the prices you already entered in resource settings. Any additional rules will use the default prices as a base. See this FAQ question for a very detailed manual of pricing manager and samples. Please note that on this and most other administrative pages there's a related help section SHOW ME which you should read in case you have further questions. The FAQ question just mentioned, for example, can be also found there.
SKIP THIS STEP
Set-up Assistant - Step:
123456
BASIC
7891011
ADDITIONAL
121314151617181920
ADVANCED
8 ADDITIONAL: Resource vacations ADD NEW SITE
Here you can define periods (one-time or recurring) when the resource cannot be reserved by your clients. Here you should enter all days of the year when your services are unavailable (because of holidays etc.) and off-season days, if your business is seasonal. Additionally, for hour-based reservations, you can enter lunch breaks or non-regular working hours. If there are existing reservation for a period you want to mark as vacation, you will be informed about this and these reservations will be marked as conflicts. Note: you can also go to the Availability page to very quickly check and reduce availability for each time unit (quarter-hour, hour or day). You can even force availability for specific time units, that is, make them available also when they are marked as vacation.
SKIP THIS STEP
Set-up Assistant - Step:
123456
BASIC
7891011
ADDITIONAL
121314151617181920
ADVANCED
9 ADDITIONAL: Reservation form layout ADD NEW SITE
Here you can fully control the reservation form. You can add additional form items (questions) such as number of persons arriving, smoking preference, passport, or even terms and conditions that the client must read and accept before making reservation. Here you can also change the ordering of items, hide standard items such as phone number or country, set the default value for all items and decide whether a field is required or not. Standard items (added by Planyo by default) are marked in black and your custom items will have the green color. You can go through this page for all of your resources or, if you have many similar resurces, you can switch to the global reservation form. This way all modifications to the global form will be reflected in many resources simultaneously.
SKIP THIS STEP
Set-up Assistant - Step:
123456
BASIC
7891011
ADDITIONAL
121314151617181920
ADVANCED
10 ADDITIONAL: Integrate with my website ADD NEW SITE
You start integration by choosing between two integration methods. Simple integration redirects your users to planyo.com to make reservation and is extremely simple to implement (simple link or code snippet). Advanced integration lets you place the whole reservation system on your website. All possible steps of the reservation (availability search, resource choice, reservation form, email verification and payment) are done on your website which your clients never have to leave. Advanced integration requires a bit more set-up but is also very easy to do. In fact, Planyo comes with 6 plugins/modules for the major CMS systems and using these plugins is just as easy as the simple integration. If you don't use these CMSes, you'll find the instructions very easy to follow and you can still embed Planyo on your website within a few minutes. The integration is organized into a number of steps (you can always use the back links to go back). In the last step you will be able to copy&paste code snippets for things like reservation link, calendar preview or search form, all to be embedded on your website - for both simple and advanced integration. You will also find templates which can be used to customize the way resources and search results are presented to the user. This requires HTML knowledge but is not necessary.
SKIP THIS STEP
Set-up Assistant - Step:
123456
BASIC
7891011
ADDITIONAL
121314151617181920
ADVANCED
11 ADDITIONAL: Subscription ADD NEW SITE
Subscription (My account tab) is where you can pay for your Planyo site. Here you can also upgrade / switch your site type to Planyo PRO (subscription-based) or PRO-COMM (commission-based). Please note that the first 30 days are always free of charge. After this time you will receive an email when your site is about to expire. The payments to Planyo work in form of credits which are deducted when a new invoice is created (no sooner than after the initial 30 free days). You should make sure the credits stay above zero so it's a good idea to pay early in which case the credits will only be deducted when a new invoice is created. The invoices are also listed here and so are the buttons for buying SMS / FAX packs (if you use SMS/FAX notifications).
...You have now completed all steps of the additional set-up. Your Planyo site is well set-up and integrated with your site. You can still go through the advanced set-up steps to discover more exciting featured offered by Planyo or to fine-tune aspects of your site (such as special wording, seasonal differences, customized notifications etc.)
SKIP THIS STEP
Set-up Assistant - Step:
123456
BASIC
7891011
ADDITIONAL
121314151617181920
ADVANCED
12 ADVANCED: Notifications ADD NEW SITE
Notifications specify which messages are sent when an event occurs, to whom and using which delivery method (email or sms). If you wish to use sms notifications, you'll need to purchase sms packs here. Other than events triggered by client or admin action (e.g. new reservation, reservation confirmed or cancelled etc.), you can also create messages sent a certain time after the reservation is made, before the rental starts or after the rental ends. All messages can be also fully customized using a template which lets you add items such as your company logo, any reservation-related information, attach documents such as contract, images or an automatically created invoice (see step 19). You can always test any message by clicking on the Edit button, then Test on the edit notification page. This will send a test message to your email address and is especially useful when you create customized messages. Notifications set for the moderator and resource admins will only be sent out when these roles are filled.
SKIP THIS STEP
Set-up Assistant - Step:
123456
BASIC
7891011
ADDITIONAL
121314151617181920
ADVANCED
13 ADVANCED: Additional products ADD NEW SITE
Now you can add additional products to your site. There are two kinds of product: one-time or recurring SHOW ME. Products can be selectable only by the administrator or also by the client SHOW ME, they can be pre-selected SHOW ME or not, and can be reservable per person or per whole reservation SHOW ME. You can also select which resources are compatible with given product. Products can be often used interchangeably with additional reservation form items (step 9), see this FAQ question for the differences.
SKIP THIS STEP
Set-up Assistant - Step:
123456
BASIC
7891011
ADDITIONAL
121314151617181920
ADVANCED
14 ADVANCED: Customized translation ADD NEW SITE
Customized translations can be used for two purposes: to customize the wording used on your site or to translate your textual content to other languages supported by Planyo. In the first case, you can use this tool to modify ALL texts visible to your clients at any step of the reservation. Especially if you chose the custom site type, Planyo will use words like resource which are too general. This is why it's good to modify all texts containing such words and replace them with e.g. bike, boat, bus seat, therapist etc. If you want to do this, go to the last step of the translation tool (User interface) and in search for text containing enter e.g. resource. This will list all texts which include the entered word and will let you translate them. If you want to use this tool to translate your content to languages other than your default one, you can do this in the second step. Simply click on the language flag you want to translate into.
SKIP THIS STEP
Set-up Assistant - Step:
123456
BASIC
7891011
ADDITIONAL
121314151617181920
ADVANCED
15 ADVANCED: Resource admin ADD NEW SITE
If you have different employees who should manage their resources in Planyo, you can give them access to their own resource. This way the employees will receive notifications, reports and do other administrative tasks related to the resource. To get started, have the resource admin create a new Planyo account, and then you can enter the email address they used here (if they don't have a Planyo account yet, you can still enter their email address and Planyo will create an account for them). This will start their access to the resource. In Actions you can also specify the exact admin pages which you don't want the resource admins to access SHOW ME.
SKIP THIS STEP
Set-up Assistant - Step:
123456
BASIC
7891011
ADDITIONAL
121314151617181920
ADVANCED
16 ADVANCED: Custom resource properties ADD NEW SITE
Custom resource properties are usually used for the search functionality. Other than the default search criteria such as start/end date or time you may also want to add other criteria, such as number of persons that can stay in a room. The properties that you add here will appear immediately in settings of all resource (step 5) so you can define their value for each resource. Then, when you copy/paste the code snippet in Integration Wizard (step 10) or when you go to Planyo plugins' settings you should add the newly created criteria to the search form.
SKIP THIS STEP
Set-up Assistant - Step:
123456
BASIC
7891011
ADDITIONAL
121314151617181920
ADVANCED
17 ADVANCED: Seasonal settings ADD NEW SITE
On this page you can enter changes in allowed rental duration (min/max time), and - in case of resources rented for whole days - allowed start/end weekdays.
SKIP THIS STEP
Set-up Assistant - Step:
123456
BASIC
7891011
ADDITIONAL
121314151617181920
ADVANCED
18 ADVANCED: Reports ADD NEW SITE
Here you can define any number of reports that you can either download on-request or that will be sent to you every day/week/month. The reports (in form of HTML / PDF / CSV for Excel) can be also automatically sent to your Google Docs (see step 20). In case of HTML or PDF reports you can customize the template giving you full control over the report. This is an advanced option and requires HTML knowledge.
SKIP THIS STEP
Set-up Assistant - Step:
123456
BASIC
7891011
ADDITIONAL
121314151617181920
ADVANCED
19 ADVANCED: Invoices ADD NEW SITE
Planyo can also take care of your invoices! You can either download them on request or have Planyo send them to you or the client as email attachment (step 12). The first decision to make is whether you want to create your own template or not SHOW ME. Creating your own template lets you fully customize the invoice. This is an advanced option and it requires HTML knowledge. You can also decide not to use a custom template and simply specify items such as tax number, company logo, text to place before and after the invoice. This way you can also have personalized invoices without complex template creation.
SKIP THIS STEP
Set-up Assistant - Step:
123456
BASIC
7891011
ADDITIONAL
121314151617181920
ADVANCED
20 ADVANCED: Google Calendar & Docs / iCal feed ADD NEW SITE
There are two ways you can have Planyo export the schedule to other applications. First you can use iCal feeds (here) which will give you individual feed URLs for your resources or a feed for the whole site. iCal feeds can be used by many applications such as Google Calendar, Apple iCal, Outlook etc. If you use Google Apps or Google Calendar you may prefer to enable direct access to your Google account. This way the reservations will appear in your Google calendar immediately (Google refreshes iCal feeds with a 4-6 hour delay). Another advantage is that you can have the reports sent to your Google Docs account as well.
Congratulations! You went through the whole set-up assistant and you now know how to personalize every aspect of your Planyo site. If you still feel some functionality is missing, check out the Help section, especially the API and custom pricing/unavailability scripts which can be used to model practically any kind of reservations and to connect to the rest of you IT solution.
Planyo will work for a vast majority of business models requiring reservations. It will adapt to your specific needs, including fields in the reservation form, pricing and payments, possibility to change all default texts, verification of bookings and much more.

Planyo requires no software to download, it is hosted on our servers. It can be used in four ways:
  • If you don't have a website: planyo will automatically create an attractive site for you and assign an easy-to-remember web address
  • If you're looking for a very easy integration with your own site: embed a search box or availability calendar, or a simple reserve button that will take your clients to our website to complete the reservation
  • If you want to include the entire booking engine on your website: by using one of our plugins (for DreamWeaver, Drupal, Joomla, WordPress and many more) or, if you use a different tool, by following simple instructions, you can keep your clients on your website during the whole reservation process.
  • If you have a large portal: META Site is a solution for tourism portals or other sites with complex infrastructure
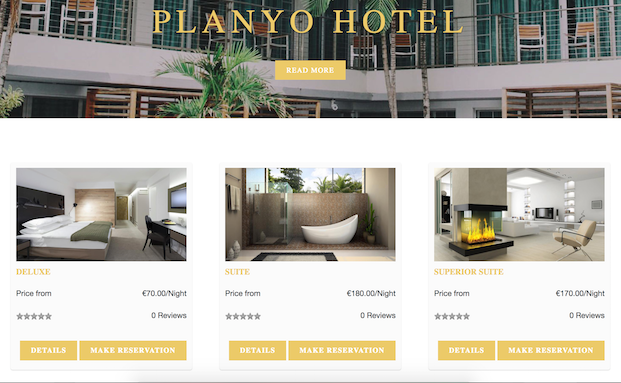
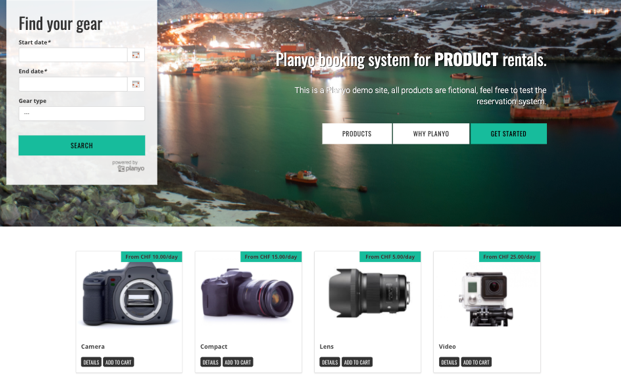
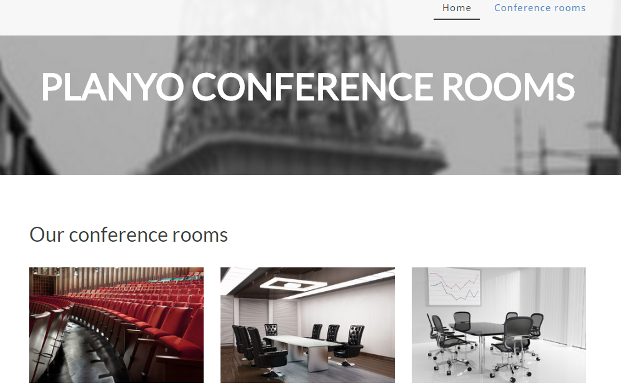
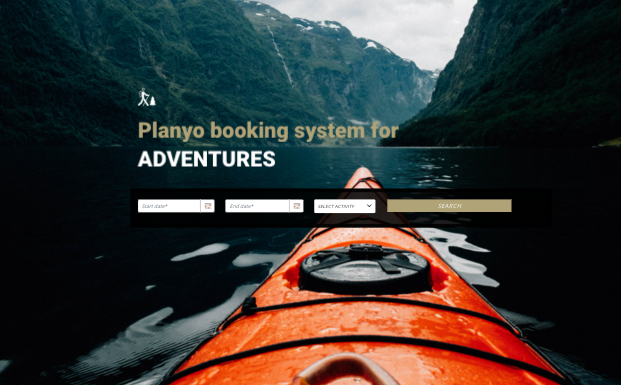
See an interactive demo
The best way to learn about Planyo is through the interactive demos below. They allow you to enter a sample Planyo site either as a customer who wants to make a reservation or as the administrator so you can see how the reservations are administered in Planyo's back-office.

Planyo site types
Below you'll find the three general site types supported by Planyo: Planyo FREE for a 100% free simple booking manager, Planyo PRO for a fully-featured online reservation system and META Site for large portals.


Pricing information (PRO / PRO-COMM)...
Differences between the FREE and PRO versions...
Plugins and modules
Planyo will work with any CMS or development software you're using. Still, to make the advanced integration (where your clients stay on your website throughout the entire booking process) even more simple, we developed a number of add-ons for the leading CMS systems:

Drupal.org module Joomla! module WordPress plugin MODx component Typo3 plugin DreamWeaver extension Facebook app